Eclipse Activity Ideas with VEX

With the path of the upcoming solar eclipse on April 8th coming quite close to where I live, the eclipse is on the minds of many. I thought I’d share a couple of ideas for how to incorporate VEX into any eclipse activities you might be doing with your students.

Mini Eclipse with 123
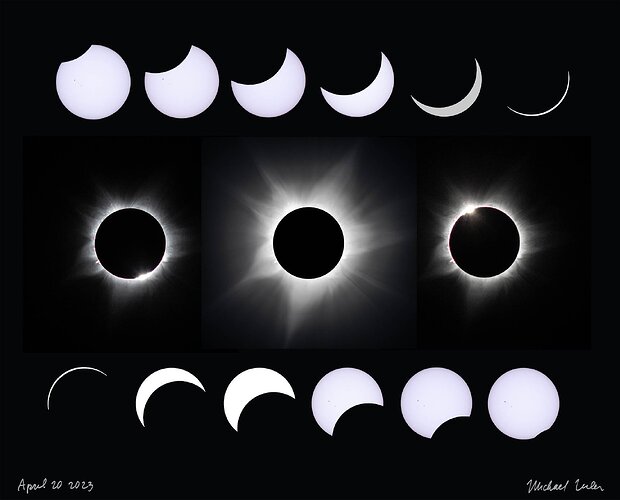
For this one, I was inspired by this image I found of the ‘phases’ of a total solar eclipse, and thought that the share of the 123 Robot leant itself quite nicely to playing the role of the Moon!


The setup is simple - put a Sun in the center of a 123 Tile, that’s just a little bit bigger than the robot itself. (I traced the Art Ring and just cut a little bit outside that line to make mine.) You can get real fancy and put a printout of the moon on the Art Ring to really bring it home.
The activity - code the 123 Robot to travel across the Sun to make the sun/moon shapes shown in the phases above. Here’s a little video to show you what I mean -

I used VEXcode 123 for this project, to be able to code the robot to move in really small increments, wait between each movement, and to turn in smaller angles to get the kind of curved path I was looking for. It took some careful thinking and visualizing to figure out the increment of movement and turning, the patterns within that, and where I wanted to position the robot to start to get my project ready. Here’s what I used in the video above -
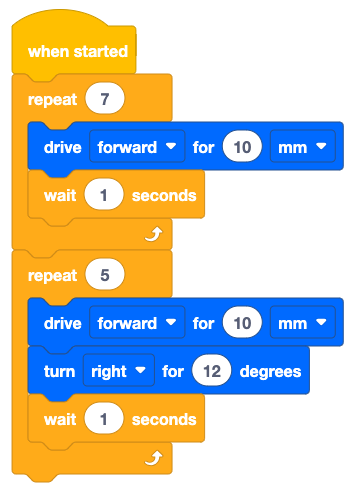
Screenshot 2024-04-02 at 2.03.47 PM

But you could do this with Touch or the Coder, and instead of having the robot move in one continuous cycle, have students experiment with the positioning of the robot to be able to recreate each phase of the eclipse individually.

You could do it as one stand alone activity, or do each phase in real time, as the eclipse is happening. Since the setup is relatively simple, it could transport outdoors really easily.

Driving the path of the eclipse with GO and IQ
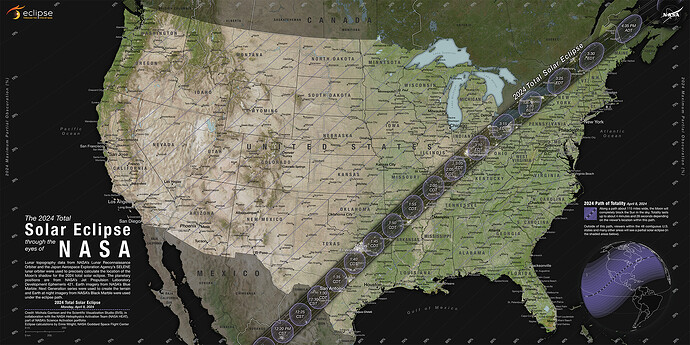
Inspired by the images of the path of the eclipse (like this one), and my memories of giant wall maps in school classrooms growing up…


I think it would be really cool to drive Col. Jo on a Code Base or code a BaseBot or build and push a Moon Buggy across one of those large maps to replicate the path of the total eclipse.

Bonus points for rotating the robot in various positions to mimic the angle of the Moon! This could be another activity to do either on its own or in real time as the eclipse is happening. Figuring out the movement increments to get it to drive a specific curved path could be a fun exploration too!

What eclipse themed activities are you thinking about doing with your students with VEX? Please share more ideas here! I’ll tag a few folks to get the conversation going - @Aimee_DeFoe @Alaina_Haws @Tina_Dietrich @Danielle_McCoy @Laura_Mackay
1 Like

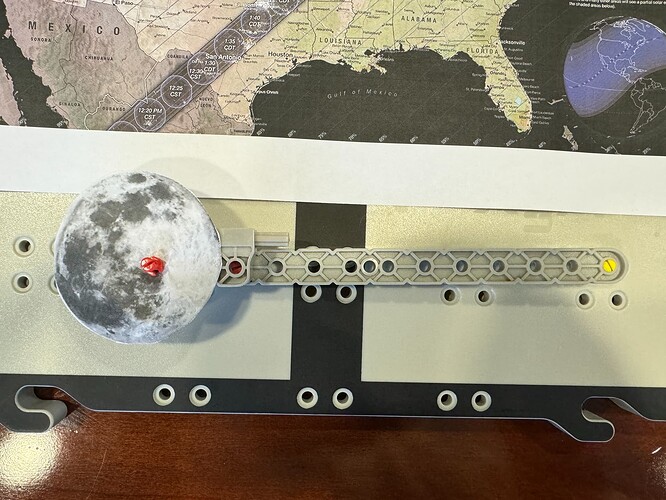
I can’t seem to get that map out of my head! Another fun idea for GO or IQ that involves a little more free building could be to have students build their own ‘Rotating Moon’ that traces the path of totality of the eclipse!

For the setup, I printed a map of the path of totality, like the one above, and attached it to a GO Tile with pins poked through the paper. I also printed and cut out an image of the Moon, to attach to the build with a pin, like this:

The activity then is pretty open ended - have students design and build their own rotation model of the Moon that traces the path of totality. There are SO many ways that students could do this, and it could be a really great exercise in collaborative building and creativity!

For my example, I used the slide beams in the Kit, so that I could adjust the position of the Moon as it traveled - since it’s not a strictly linear path, but a curved one. Here it is in action, to give you an idea to get started with… (I used a GO Kit for this example, but this works just as well with either GO or IQ.)

I really love the open ended nature of this activity, and would LOVE to see the different models students come up with!

2 Likes

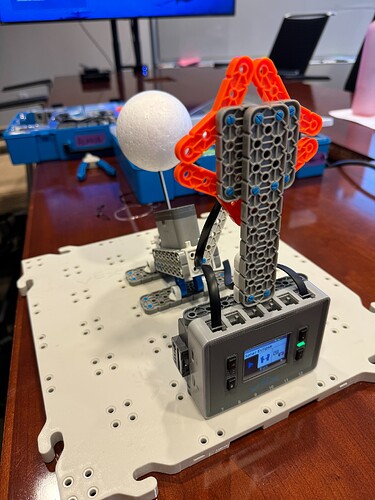
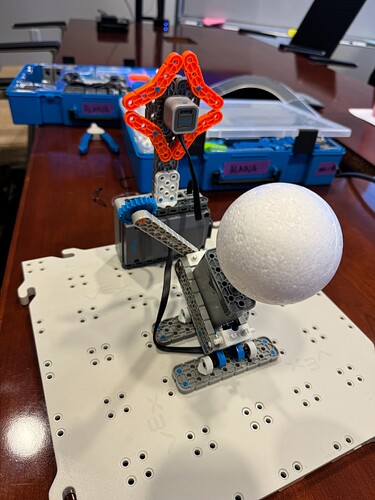
I was thinking a lot about different IQ applications and came up with this adaptation for the Day and Night VEX GO STEM Lab but making it about the solar eclipse with VEX IQ!

In the Day and Night STEM Lab, students investigate the rotation of the Earth. So why not add the Moon into the mix to showcase the eclipse! While GO and IQ have many similar pieces, I had to make some modifications to make the build work. You can see here I mounted the Brain on its side so it can serve as a little platform for the Sun, then created a little basket for the motor since the IQ motor only has mounting holes on one side. But overall, this worked just like the GO build!

To add in the Moon, I used part of that motor ‘basket’ as a way to mount another long beam with a smaller gear to act as my moon.

As the Earth rotates, I can manually move the Moon in between the Earth (the styrofoam ball) and the Sun (the LED on the Optical Sensor) and create my own shadow/eclipse.

Students could go through the same process to create their own models of the Earth’s rotation and try different heights for the Sun and Moon and see how that impacts the shadows as well.

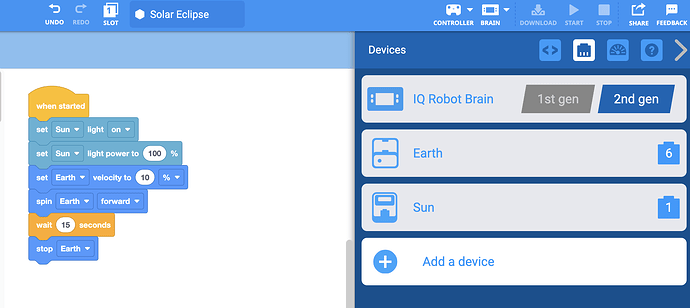
Also in a fun, thematic application, when I was making my VEXcode project, I named my motor and Optical Sensor based on what was being modeled (the Earth and Sun). This could help students make those connections between the behaviors in their model and the behaviors in VEXcode!

2 Likes

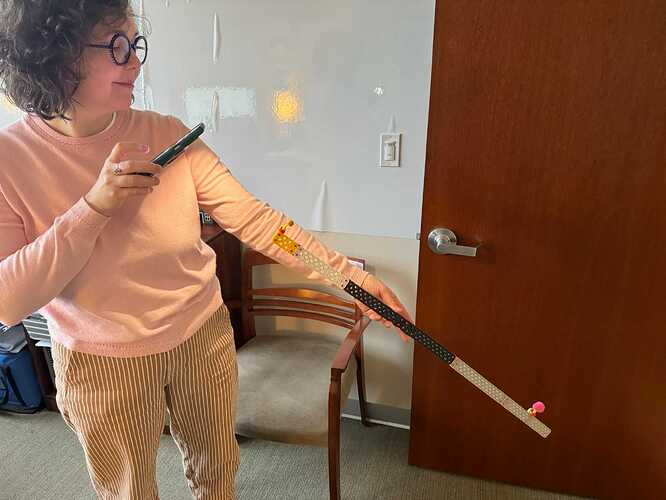
Here’s one more for you! You can use GO pieces to make a simple scale model of a solar eclipse! To help your students make their model to scale, your students will need to know that:

  • The Moon is 1/4 the size of the Earth
  • There are just about 30 Earth diameters between the Earth and the Moon.

Materials needed:

  1. GO Large Beams to connect to make a total length of 33 inches or just over
  2. Red Large Beams and Red Pins to connect the Large Beams
  3. 2 Green Beams
  4. 6 additional Red Pins
  5. 2 Red Connectors
  6. 2 Yellow Pins
  7. Beads, pom poms or other round objects to represent the Earth and the Moon. Your Earth object should be about 1 inch, and your Moon object should be about 1/4 inch. I used pom poms for my model.
  8. Adhesive dots or two-sided tape

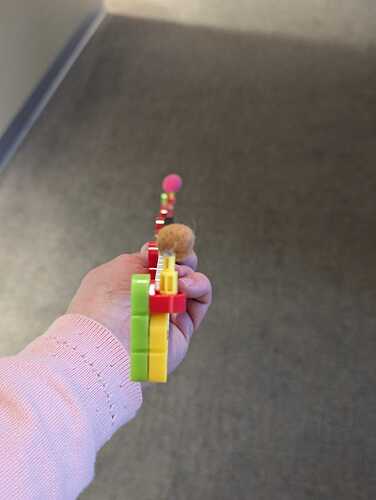
First, you will need to connect Large Beams together to make a longer beam that is at least 33 inches long (you can go a little over, but not too much or it will be too hard to manage).

I used:

  • 2 Gray Large Beams

  • 2 Black Large Beams

  • 1 White Large Beam

  • 1 Yellow Large Beam

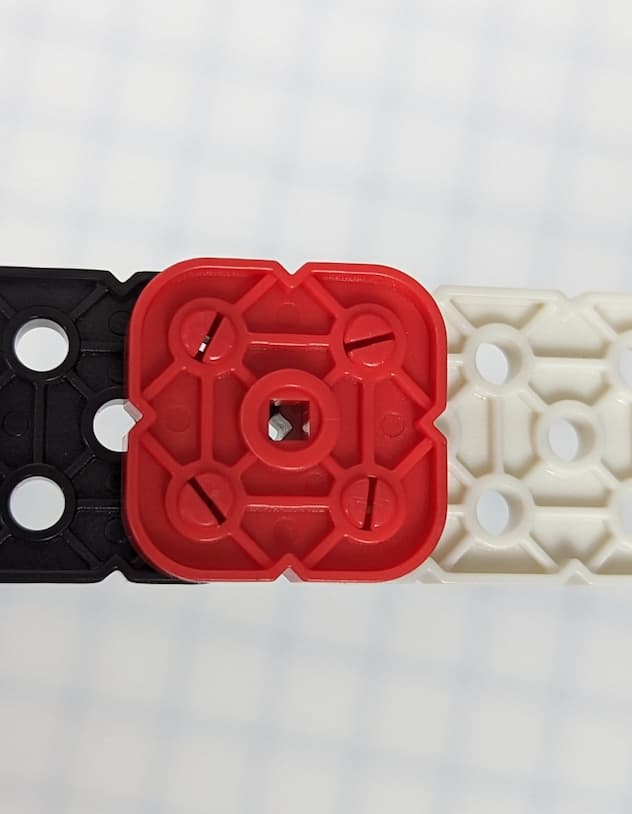
  • 5 Red Square Beams

  • 20 Red Pins

Step 1
Use the Red Square Beams and Pins to connect each beam together to make a sturdy, long beam.


Step 2
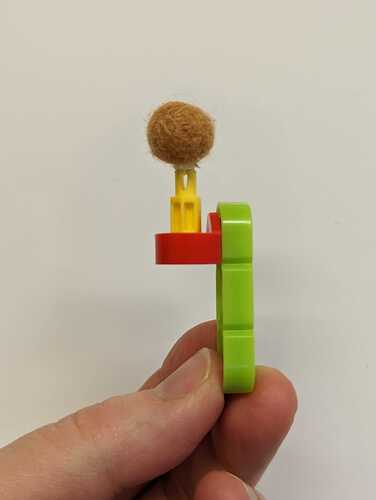
Attach each Red Connector to one end of each of your Green Beams, and attach the Yellow Connector to the Red Connector like this:

Then, use your adhesive dots to attach your Earth and Moon to the Yellow Connectors.

Step 3
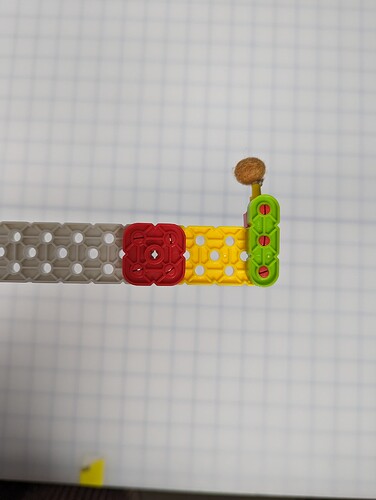
Now you need to attach your Earth and moon to the beam you made. Because your Earth is 1 inch in diameter, you can place your moon 30 inches away from it on your beam, so your model is basically to scale. My beam is 33 inches long, so I attached my Moon on one end, then measured 30 inches from the end to attach my Earth.

Step 4
Now you are ready to test it out! Ideally, you have a nice sunny day and you can take your students outside and use the actual sun for this. Here in Pittsburgh, sunny days have been hard to come by lately, so we tried it out with a flashlight in a dark room, which works pretty well too.

Hold the model so that the Moon is between the Sun (or your light source) and the Earth. The Moon will cast a shadow on the Earth, showing what happens during a solar eclipse! You will likely need to play with the angle at which you are holding the model to get the best possible shadow. And, if you are inside and using a flashlight, have someone hold the flashlight at different distances from the Moon side of the model as well to test out the best shadow.


And, if you turn the model around so that the Earth is closest to you (between the Sun and Moon), then you will have a model of a lunar eclipse, where the Earth casts a shadow on the Moon!

I hope you and your students enjoy combining the excitement of the eclipse with the fun of VEX GO! And, as your students are making this model, they’ll be practicing measurement and addition as well (as they figure out the right combination of Large Beams to use).

If you are an IQ Teacher you can use this same idea, and just swap out pieces from the IQ Kit!

2 Likes

Great ideas! I know lots of teachers out there looking for things to do.

3 Likes

These are great examples/ideas! Thank you

1 Like