Hello everyone! ![]()
I wanted to create this post to explain the V5 Workcell STEM Lab progression of Labs 1-13 and the Workcell Extensions. I believe that understanding how the Labs were designed, as well as how they scaffold learning, provides important context when teaching with the V5 Workcell.
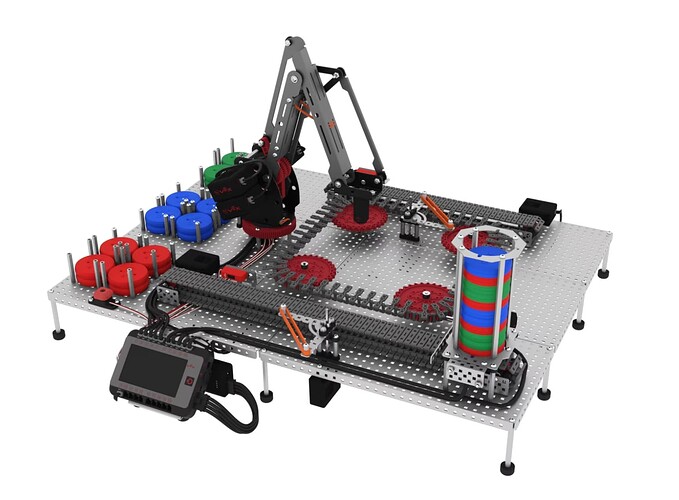
Overall, Labs 1-12 and the Extensions are scaffolded in a way to prepare students to design their own Workcell Layout in STEM Lab 13. The V5 Workcell curriculum is a genuine experience of integrated STEM that exposes students to industrial robotics and factory automation in an accessible and hands-on way. Students get building and coding experience, but they also get a real-world application of mathematics and science concepts such as the Cartesian Coordinate system, variables, and movement in 3D space.
I’ll start with the explanation of first three STEM Labs. The first three Workcell STEM Labs introduce students to industrial robotics, safety, and how the arm of the Workcell operates in 3D space.
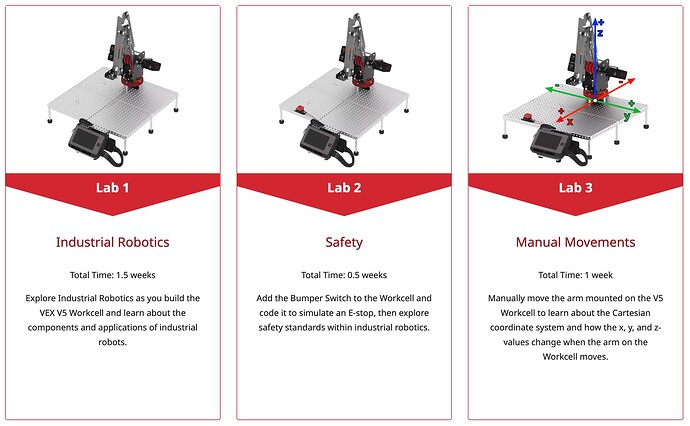
The Introduction to the V5 Workcell (Labs 1-3)
-
Lab 1: The very first STEM Lab that students are introduced to with the Workcell. The whole purpose of this Lab is to walk students though the building the Workcell using step-by-step build instructions, so all students can be successful even without any prior building or engineering experience. While building the Workcell, students will learn how to master it, and why this is vital for the Workcell’s functionality.
-
Lab 2: After students build the Workcell and understand how to master it properly, students progress into learning about the importance of safety—both in the classroom and industry—and simulate an Emergency Stop using a Bumper Switch. Safety is important for students to understand before diving in to actually having the Workcell move (either by hand or autonomously).
-
Lab 3: Once students have built the Workcell and have a basic understanding of safety, they then move into learning how the arm of the Workcell operates in 3D space. Students begin by manually moving the arm while displaying the current x, y, and z-coordinate values in real time on the V5 Brain’s screen. Students have to understand how the Workcell arm operates in 3D space, in order to code the arm to move to a discrete (x, y, z) location (to pick up a disk or to maybe draw using the marker attachment).
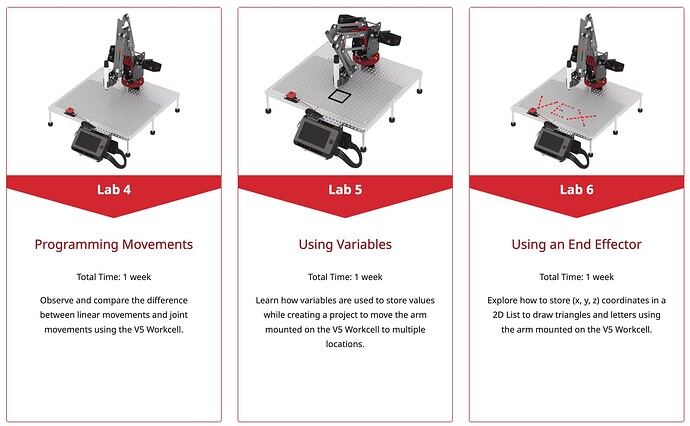
Coding the V5 Workcell for Automated Movements (Labs 4-6)
Up until this point, students have only seen the Workcell manually move. STEM Labs 4-6 focus on coding for autonomous movements, specifically to explore autonomous movements along the x, y, and z-axes. It’s important to understand the scaffolding here. Notice that first the students explored how the arm of the Workcell moved manually before taking that information and adding on the additional layer of coding for autonomous movements.
-
Lab 4: Students explore the difference between linear and joint movements along the x and y-axes, and how each has their own benefits. Students first need to understand what types of movements the arm of the Workcell can make before applying them in particular situations.
-
Lab 5: Students combine their newly-formed coding skills with mathematics by introducing variables to store an initial (x, y, z) coordinate. They then add increments to the initial stored coordinate value to move a marker along the x and y-axes. In this Lab, students code the arm of the Workcell to move with more precise movements (to draw a square). This allows students to practice coding the arm to move in both the x and y-axes. This is intentional, because we didn’t want to overload students by trying to practice coding in all three axes (x, y, z) at the same time.
-
Lab 6: Students continue drawing using the marker along the x and y-axes, but must also pick the marker up between shapes or letters using the z-axis. This progression of skills prepares students to navigate the arm along all three axes (x, y, z). Particularly with the z-axis, students will need to practice coding the arm to raise and lower correctly, so that they can pick up and move disks in later Labs with accuracy and precision.
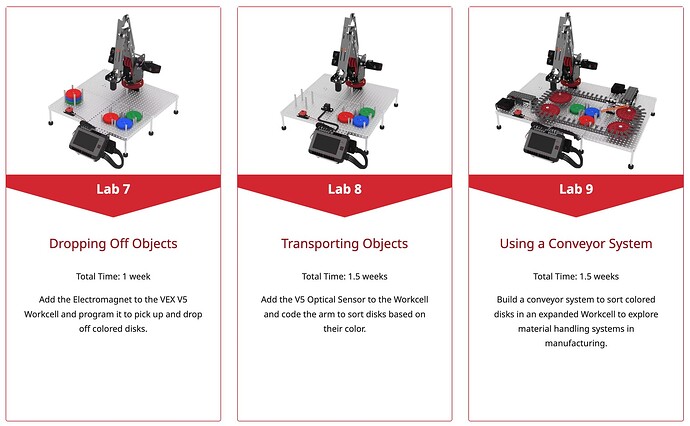
Exploring Pick and Place (Labs 7-9)
Now that students have explored coding the arm for autonomous movements using the marker attachment, they have the foundational skills to begin picking up and placing disks. STEM Labs 7-9 focus on the introduction to the Electromagnet and the picking, placing, and transportation of colored disks.
-
Lab 7: Students are introduced to the Electromagnet by interacting with a User Interface (UI) on the V5 Brain’s screen that acts as colored buttons. The student identifies the color of the disk at the top of the pick up location and selects the corresponding button on the screen. This triggers the arm to pick up the disk and drop it off in a drop off location specific to that color. This allows students to recognize how picking up and placing disks works at a foundational level before adding sensors that can further automate this process in later Labs. For example, the “sensor” really being utilized here is the student’s eyes and their ability to distinguish the color of the disk and then make a decision to select the same color on the Brain’s screen. This is making a decision based on color detection, which can be automated using conditionals in coding as well as the Optical Sensor (to distinguish color). Earlier learning about the z-axis and the differences between linear and joint movements is applied at a basic level.
-
Lab 8: Building from the previous Lab, students add an Optical Sensor to automate the process of identifying disk colors. Students further build on their knowledge of the z-axis because they must consider how the z-axis will change for the pick up location each time a new disk is picked up, since there will be more than one disk loaded to begin with. Lab 8 makes deep connections to many earlier concepts, including linear and joint movement; exploration of the x, y, and z-axes; and the advantage of sensors for automation.
-
Lab 9: Students are introduced to conveyors for the first time by adding time-based conveyors to their Workcell build. Using time-based conveyors helps students understand how fast they spin and in which direction, before introducing sensors in the next Lab to control their movements. Introducing conveyors using time-based movements first also allows students to consider the advantage of using sensors to automatically start and stop conveyors in the next Lab.
Transport and Sort Disks (Labs 10-12)
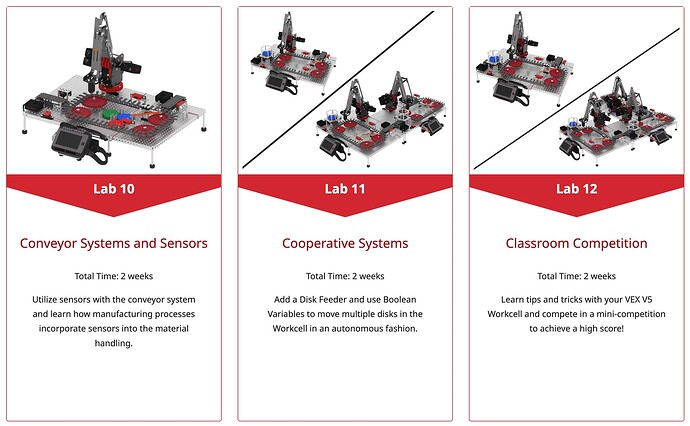
Now that students have knowledge of how to code the arm of the Workcell in 3D space to pick up and place disks based on color, as well as how conveyors move at a foundational level using time-based movements, students will begin to further automate the disk sorting process by adding more sensors to the conveyor systems and a disk feeder to dispense multiple disks at once without human interference.
-
Lab 10: Students further automate how disks travel along the conveyors by adding an Optical Sensor and Line Trackers. Prior to this Lab, the student would place whatever color disk they decided on the conveyor to be transported based on time increments. The Optical Sensor triggers certain behaviors based on the color detected, automating color detection. Line Trackers are added to start and stop certain conveyors when triggered, and to engage the diverter. Students see that using sensors instead of time-based conveyors ensures that the disks will stop in the same location each time, regardless of slippage or any environmental factors that could have affected it.
-
Lab 11: Instead of one disk being fed into the system at a time by the student, a disk feeder is added to automate the process, allowing for multiple disks to be dispensed at once. If there is more than one Workcell in the classroom, students have the option to experience cooperative systems. For example, students could create a program where the first of each colored disk is sorted on Workcell one, and the second is diverted into Workcell 2 and sorted there.
-
Lab 12: Up until this point in the series of Labs, the students have experienced heavily scaffolded curriculum with discrete build instructions and code examples. Lab 12 allows students to explore how to slightly alter the Workcell using all of the knowledge they have learned in Labs 1-11 to engage in a classroom competition. Some examples of alterations could include adding additional sensors or extending the height of the disk feeder to hold more disks.
The Workcell Extensions
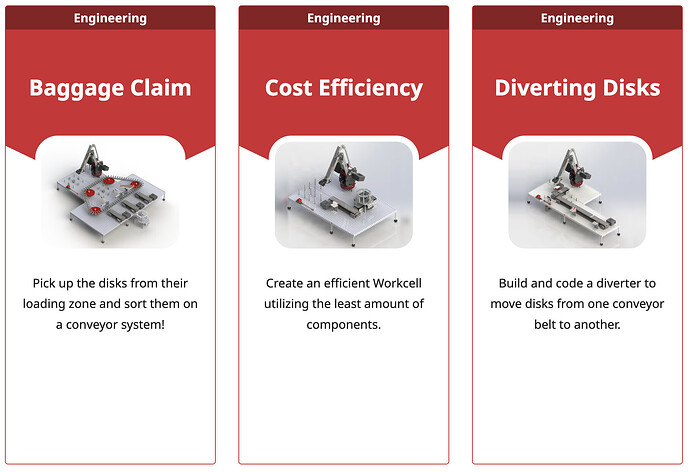
The VEX V5 Workcell Extensions are designed to further explore concepts covered in STEM Labs 1-12 and introduce students to additional sorting and automation concepts. These Extensions should be completed after going through all twelve of the VEX V5 Workcell STEM Labs in preparation for STEM Lab 13: Capstone Project.
The Extensions require students to plan and build new sections of the Workcell to gain hands-on experience with specific engineering concepts. There are no build instructions for the Extensions, but construction of specific mechanisms is covered. This is intentional to begin to remove the scaffolding of building only predefined builds and allows for more modification of the original Workcell builds, bridging the gap between using build instructions in Labs 1-12 and free-building in Lab 13. While the STEM Labs are designed to be completed in a specific order, the Workcell Extensions can be completed in any order. However, the concepts in some Extensions are more complex than others.
STEM Lab 13: Capstone Project
Everything the students have learned up until this point in Labs 1-12 and the Extensions will now be applied in a competition setting with STEM Lab 13. This is different from anything the students experienced in Labs 1-12 or the Extensions, because it requires students to design a Workcell layout from scratch based on their strategy for the Capstone Project Competition. Students will apply their engineering and coding skills in order to be successful in this Lab.
I hope that this explanation helps illuminate how the V5 Workcell STEM Labs and Extensions are scaffolded in a way to build on knowledge as students further engage with the Workcell.
I gave a presentation on the Introduction to the Workcell (covering the above progression) at the 2022 VEX Educator Conference, you can view that presentation here ![]()
To view our recommended pacing, check out the Cumulative Pacing Guide.
