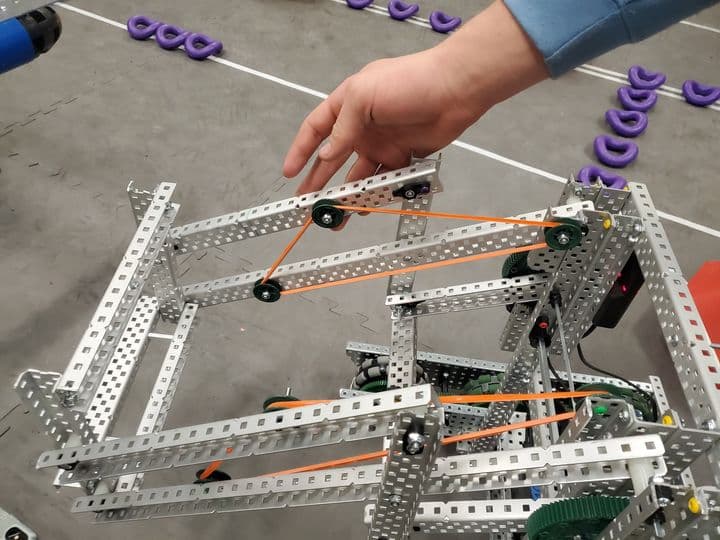
Hi! I saw this on one of the community sites I belong to, and thought this was a great question. Ideas?
This student wasn’t sure where to put the pulleys for increased lifting power with rubber bands. Are there any guides for how to teach the physics of this? Trial & error is all the teacher could could tell him.
Here is my method for locating rubber bands to assist an arm.
- Start with the arm down and the robot off.
- Manually move the arm up from lowest to the highest position
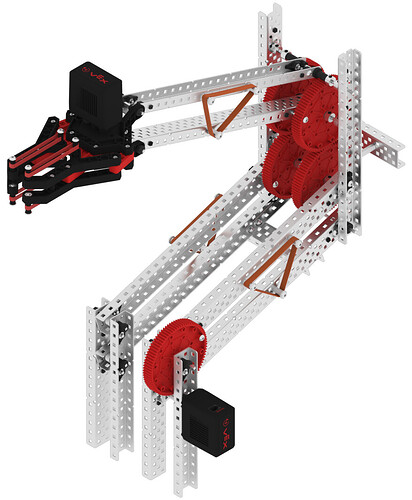
- Watch the arm move from the side of the robot (per the above design photo)
- As it moves, find two holes that started far apart, but ended up close together. Both points can be on the arm, or one on an arm and one on the non-moving chassis.
- The larger the movement from Far to Near, the greater the rubber bands will help.
- Now start connecting rubber bands between the points. Make sure that when the arm is UP, the rubber bands are not loose. If they are make two loops out of each rubber band so it is effectively shorter.
- Keep adding more rubber bands until the arm can hold its position on its own at the half way up position.
Let me know if this helps.
Perfect I will share in my group! 
Here is some additional information.
6.5. For 4-bar, 6-bar and 8-bar arms only: To more efficiently use the elastic bands (not rubber because all of the VEX supplied bands are actually silicone), a secondary point on the top bar of the 4-bar can be chosen such that a triangle can be made with the elastic band. Both the top points need to be closer to the bottom points when the arm is up than when it is down.
1 Like


