Programming for 30 minutes, debugging for 3 hours? Whether you’re a beginner or an IT expert, encountering bugs is inevitable. Practical debugging tools on the programming platform can provide us with great help in troubleshooting.
VEXcode VR has powerful debugging tools that enable us to monitor data, visualize robot states, and identify potential issues. Using these tools effectively will significantly enhance our coding efficiency and ensure the successful completion of a coding task.
- Project Stepping Feature
The Project Stepping Feature in VEXcode VR is a beginner-friendly debugging tool that allows us to go through the project one block at a time to observe robot behaviors and correct coding mistakes.
To use the Project Stepping Feature: 1. Select the step button at the top right of the toolbar(Image1). 2. Continue to click the step button to run through the project one block at a time.

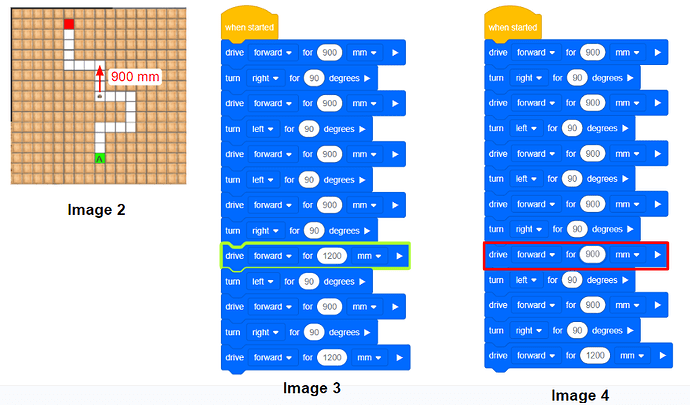
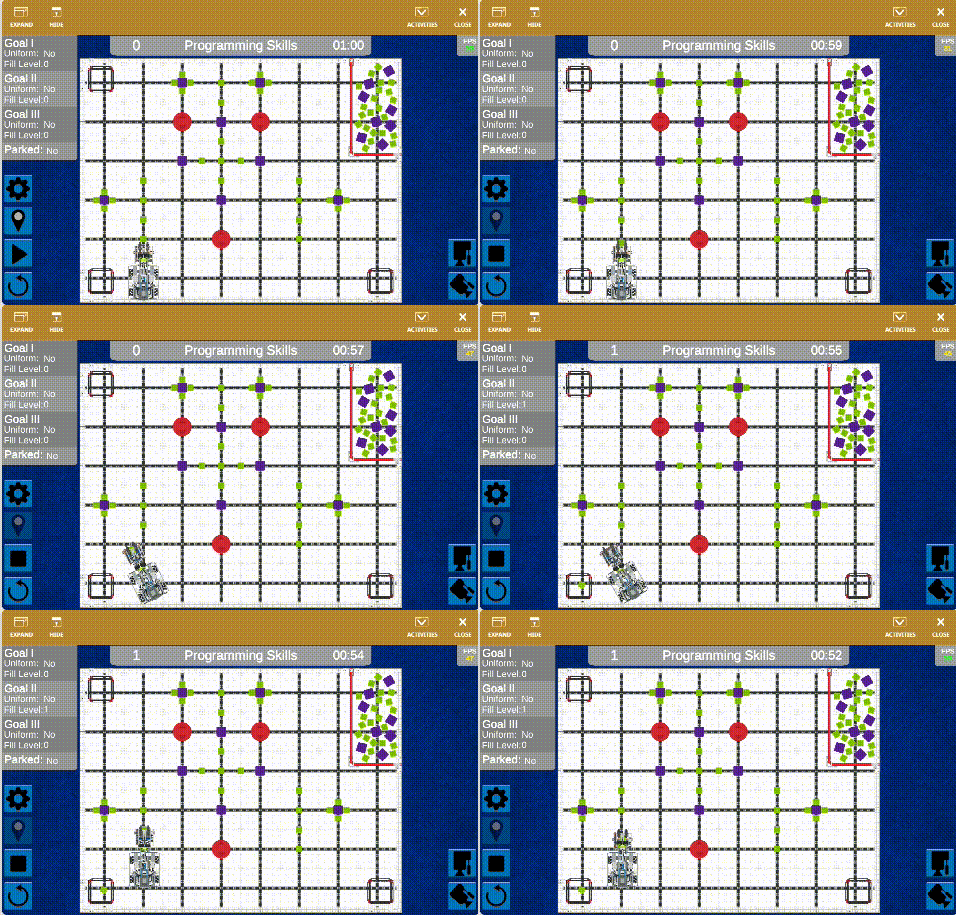
The flowing example shows how to use the Project Stepping Feature to debug. The project intends to drive the VR Robot from the Green Start Position to the Red End Position on the Wall Maze+ Playground. However, the robot collided with the wall during the program execution.
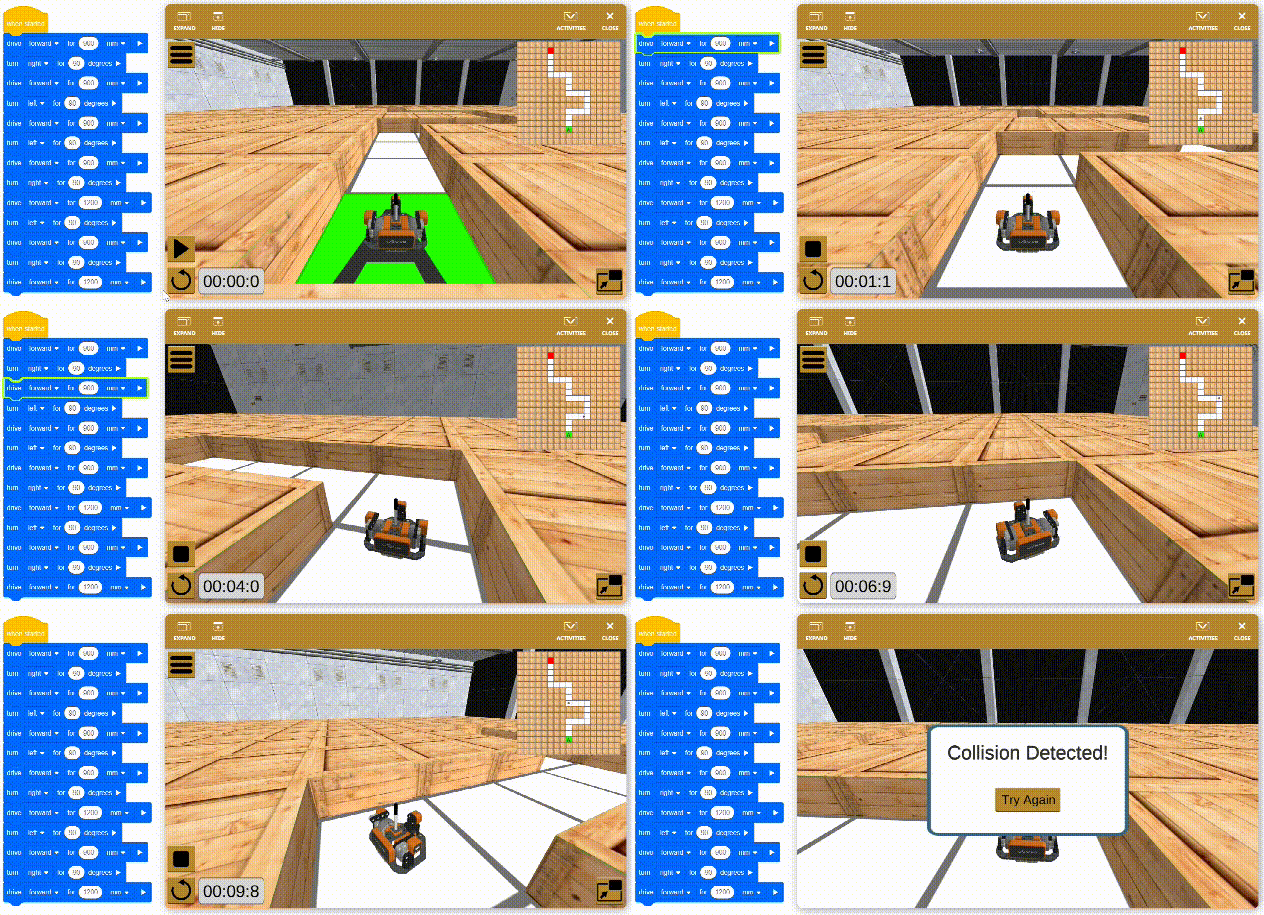
Using the Project Stepping Feature to run the project step by step, we can observe the robot’s behavior clearly (Image 2), identify the issue (Image 3), and then fix the bug (Image 4).
- Monitor Console
The Monitor Console in VEXcode VR enables us to view the selected sensor data. When program errors occur, this data is a crucial clue in troubleshooting.
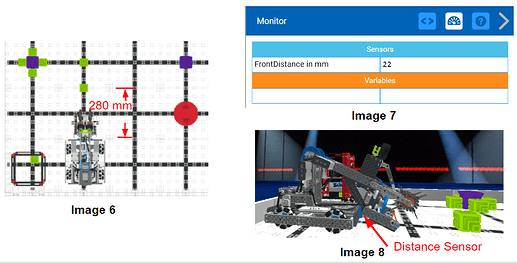
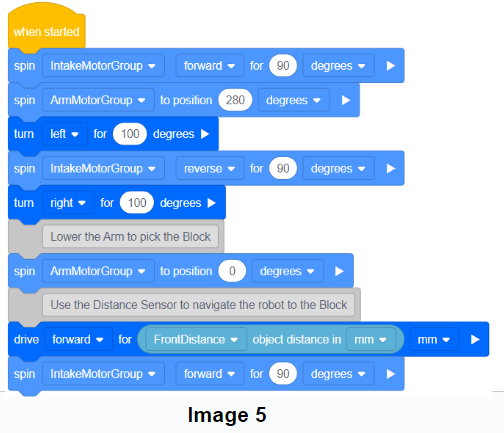
Please take this code for example (Image 5): after placing the first Green Block into the Goal, the robot aims to drive to the closest Green Block and collect it. We use the Distance Sensor to report the distance between the robot and the Block, and then drive the robot to cover that distance to the Block to pick it up. However, the robot didn’t move to reach the expected spot.

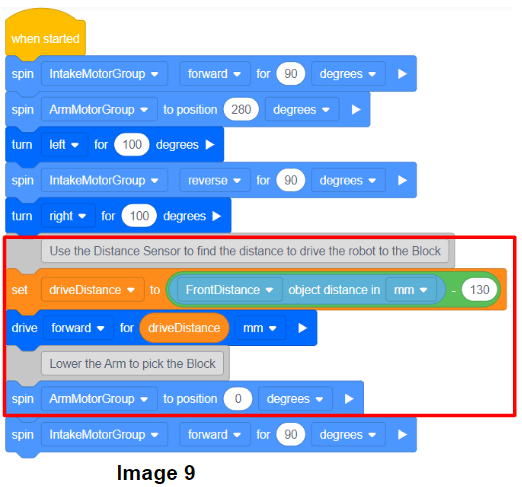
In the Monitor Console, we can see that the value of the Distance Sensor is 22 mm (Image 7), while the actual distance to the Green Block should be around 280 mm (Image 6)(Each square on the VIQC Virtual Skills Field is 300mm by 300mm.). This means that the closest object to the robot is not the Green Block. Through data analysis, we identify the issue: the robot Arm’s position makes it obstructs the distance sensor (Image 8). Thus the reported distance is not the distance between the Distance Sensor and the closest Block.
Hence, the solution becomes quite clear: make sure the robot reaches the Block first and then lowers the Arm. So that we can get the distance between the robot and the Block for navigating.(Image 9) (Note: To determine the drive distance, we also need to consider the distance between the Intake and the distance sensor when intaking a Block.)
- Print Block and Print Console
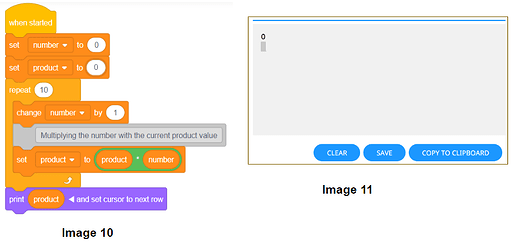
Printing out variable values is another effective debugging technique. In VEXcode VR, if the program’s outcome doesn’t align with the expected result, we can strategically insert Print blocks into the program, track the changes in variable values in the Print Console, and identify where the issues are occurring. Let’s look at the following example (Image 10).
The project intents to calculate the product of the numbers from 1 to 10. It uses a loop to iterate through these numbers, multiplying each number with the current product value. However, the project outputs a calculated product of 0 (Image 11), which is clearly incorrect.
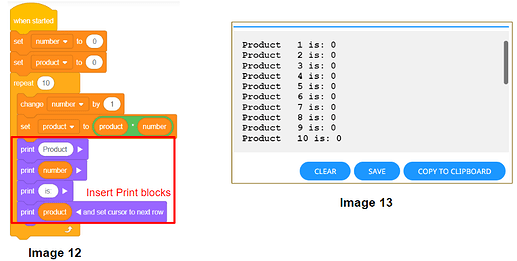
To identify the problem, we can insert Print blocks within the loop to track the product variable (Image 12). In the Print Console, we see that the values of the product variable consistently remain at 0, without any changes (Image 13).
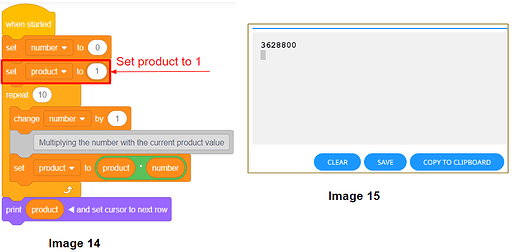
Upon data analysis, we can determine that the issue arises from mistakenly initializing the product variable with an initial value of 0 instead of 1.
After correcting the error (Image 14), the project can successfully calculate the accurate product of numbers from 1 to 10 and print the result in the Print Console (Image 15).
To be continued.
Hope this helped and please let us know if you have any questions, comments, or feedback. Thank you!
