The Example Projects is a unique feature of VEXcode. It can help us learn how to use various coding blocks and sensors, or how the blocks can be combined to perform certain robot behaviors. Especially when we want to figure out how to complete a task in a specific robotic challenge, the Example Projects can be super helpful!
Image this scenario: the new VEX Robotics Competition has just been revealed, and we’re eager to try it out after learning the game rules. However, when we select the VIQC or VRC Virtual Skills in VEXcode VR, we might find ourselves stuck with a question: how to code the robot to score? In such moments, we can find an answer from the corresponding Example Project in VEXcode VR.
Open an Example Project in VEXcode VR
To Open an Example Project in VEXcode VR, we need to:
- Select the File menu. (Image 1);

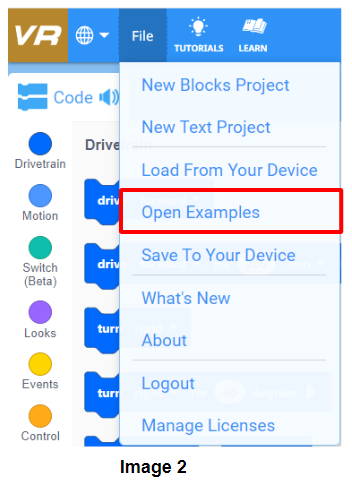
- Select Open Examples. (Image 2);
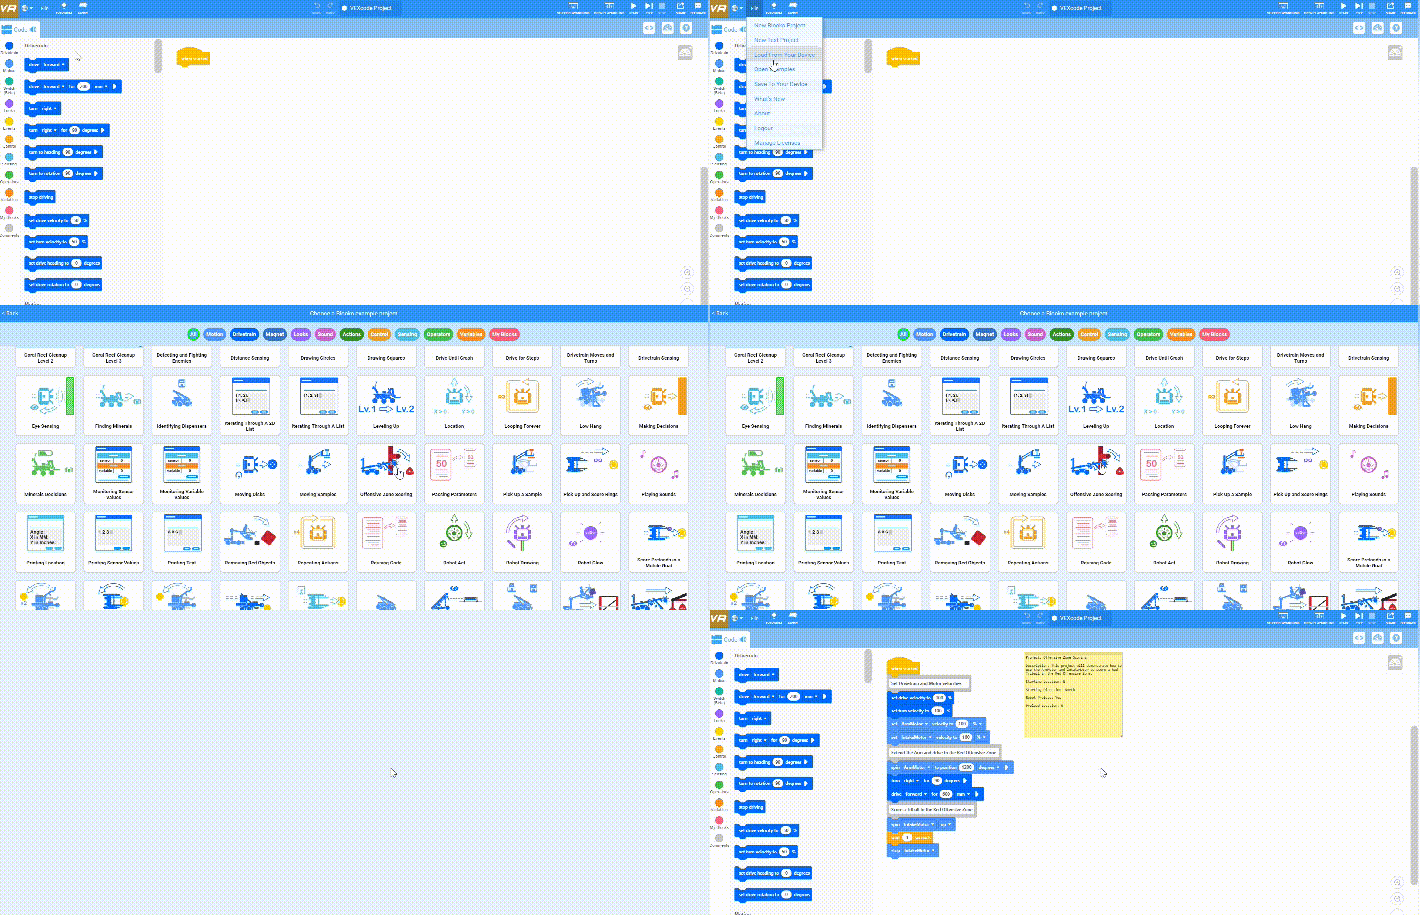
- Select the icon of the corresponding Example Project according to our requirements.
Note: The Example Projects is not only a guide that teaches us how to code the robot to accomplish specific tasks but also a great resource for learning basic programming concepts and how to use various features of VEXcode VR.
For more information about using Example Blocks Projects in VEXcode VR, please see this article.
Learn how to code the robot to perform a specific behavior
The project code will appear in the Workspace after opening an Example Project in VEXcode VR. Through reading the code, figuring out the code blocks that perform a certain behavior, and observing the robot’s actions in the Playground, we can learn how to code the robot to accomplish a specific behavior.
For instance, when starting the Coral Reef Cleanup challenge, we might have no idea how to collect trash on the Playground. In this situation, the Coral Reef Cleanup Level 1 Example Project (Image 3) can help us learn how to program the robot for this task.
The following is the Example Project. First, we need to read the Note to learn what the project does and how to set the Playground to run this Example Project properly. Next, we can read the code carefully to understand the project’s workflow and figure out the code blocks that perform the trash-collecting behavior.
Then, to get a better understanding of the execution of the project, we can run the Example Project on the Playground, observing how the robot accomplishes the trash collecting.
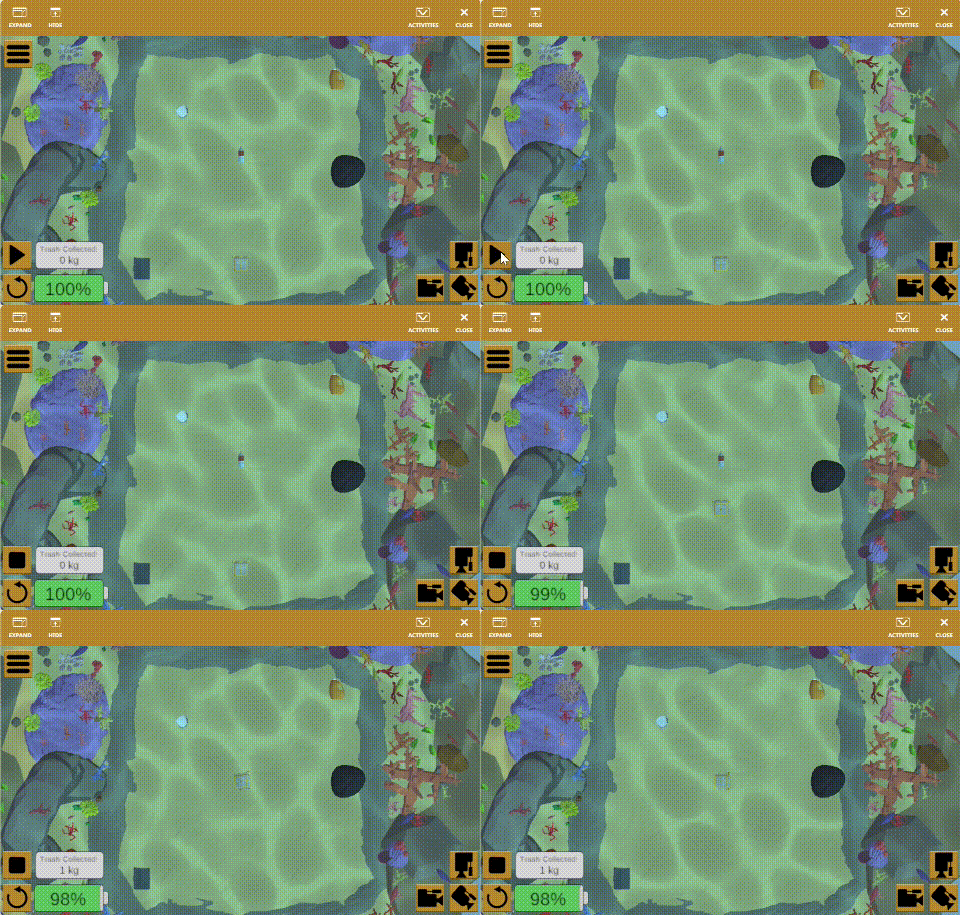
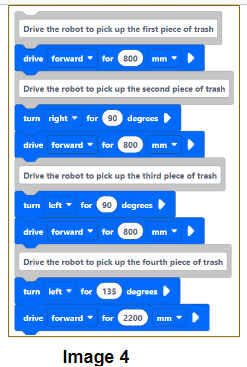
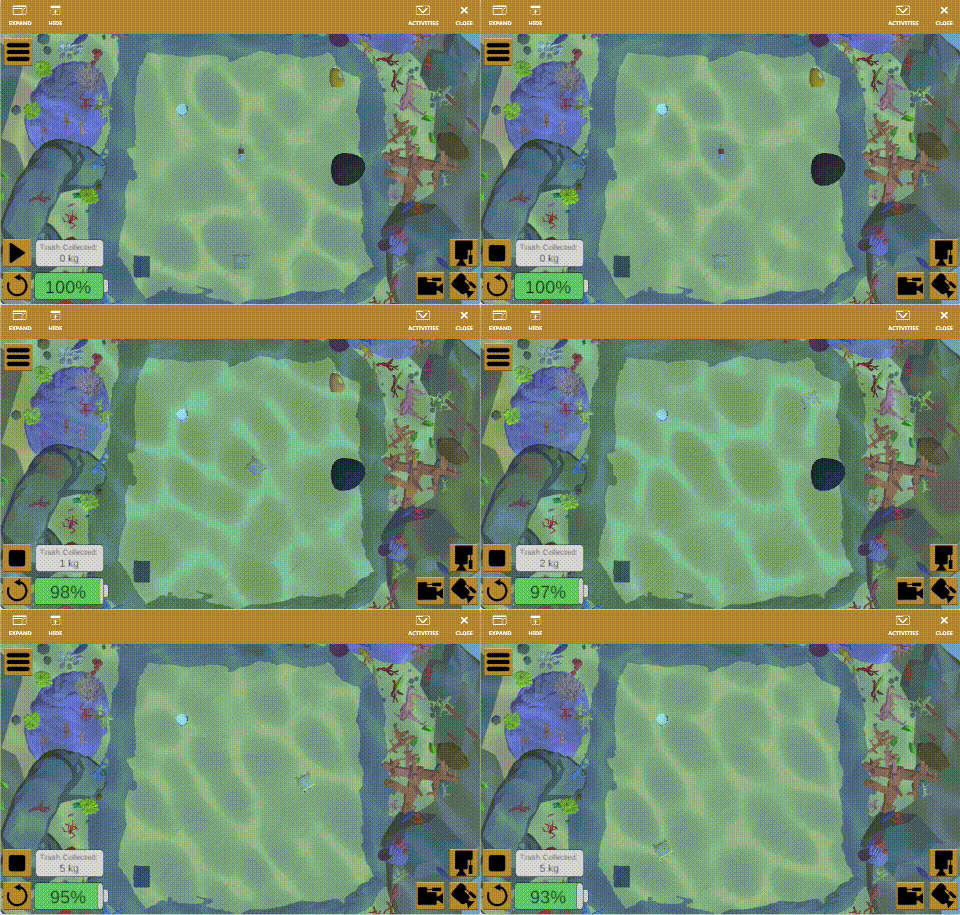
Through observation, we can figure out that when the robot reaches the position of a piece of trash, it will collect the trash. Thus, based on the Example Project, we can use more drive for and turn for blocks to instruct the robot to drive toward the trash, collecting as much as possible (Image 4).
Learn how to use a sensor to navigate the robot.
While adding drive for and turn for blocks to the Coral Reef Cleanup Level 1 Example Project, we have to keep estimating and testing the drive direction and drive distance for the robot to collect the trash.
Therefore, we might ask ourselves a question - is there a better way to find the drive direction and drive distance for the robot to collect trash on the Playground? The answer is yes!
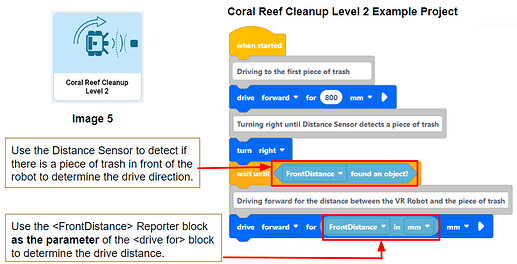
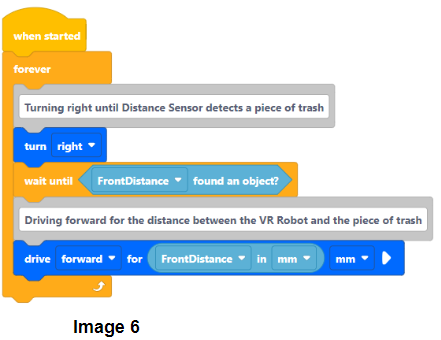
The Coral Reef Cleanup Level 2 Example Project (Image 5) shows us how to use a Distance Sensor to determine the drive direction and drive distance for the robot to collect the trash.
Once we understand the underlying behavior sequence and the project’s algorithm, we can put the code blocks into a loop to repeat this behavior (Image 6), enabling the robot to collect as much trash as it can.
Optimize the Example Project to improve the robot’s performance
The purpose of the Example Projects in VEXcode VR is not to let us simply copy the code into our own project but to teach us how to use various code blocks and sensors to solve problems. Therefore, an Example Project only demonstrates a fundamental method for accomplishing a specific task, leaving plenty of room for further optimization.
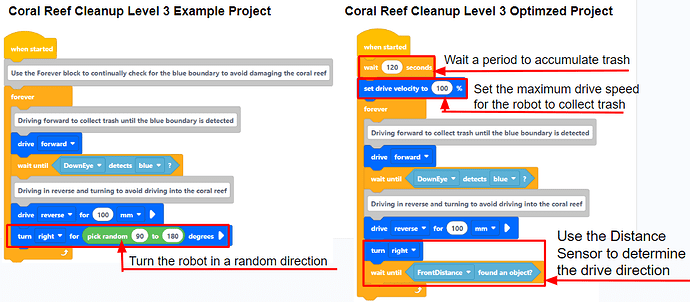
Let’s look at the Coral Reef Cleanup Level 3 Example Project.
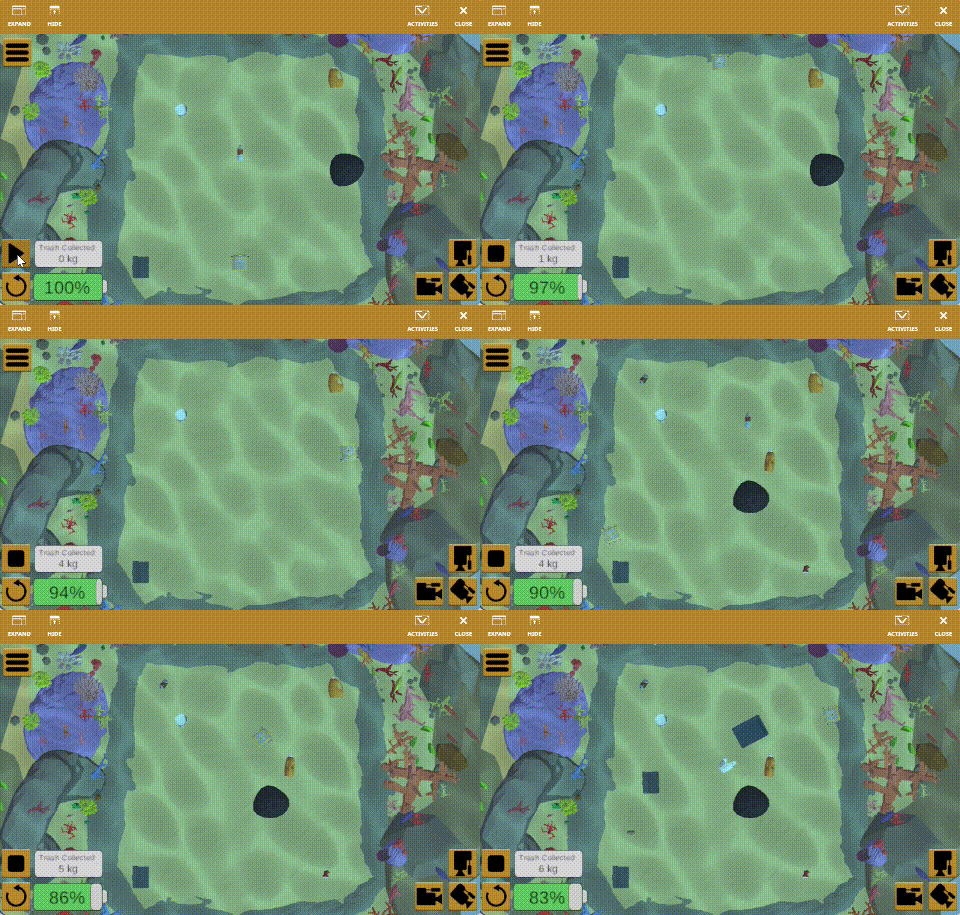
This project uses the Forever block with the Down Eye Sensor to continually drive the robot forward to the blue boundary in different directions to collect the trash on its way. When the VR Robot detects a blue boundary, it will back up and turn.
Can we optimize this Example Project to enhance the robot’s performance? Absolutely!
To boost the robot’s efficiency, we can 1). Code the robot to wait a specific period to accumulate more trash for the robot to collect at once; 2). Set the drive velocity to 100%, enabling the robot to collect trash as fast as possible. 3) Use the Distance Sensor to determine the drive direction for collecting each piece of trash instead of driving in a random direction.
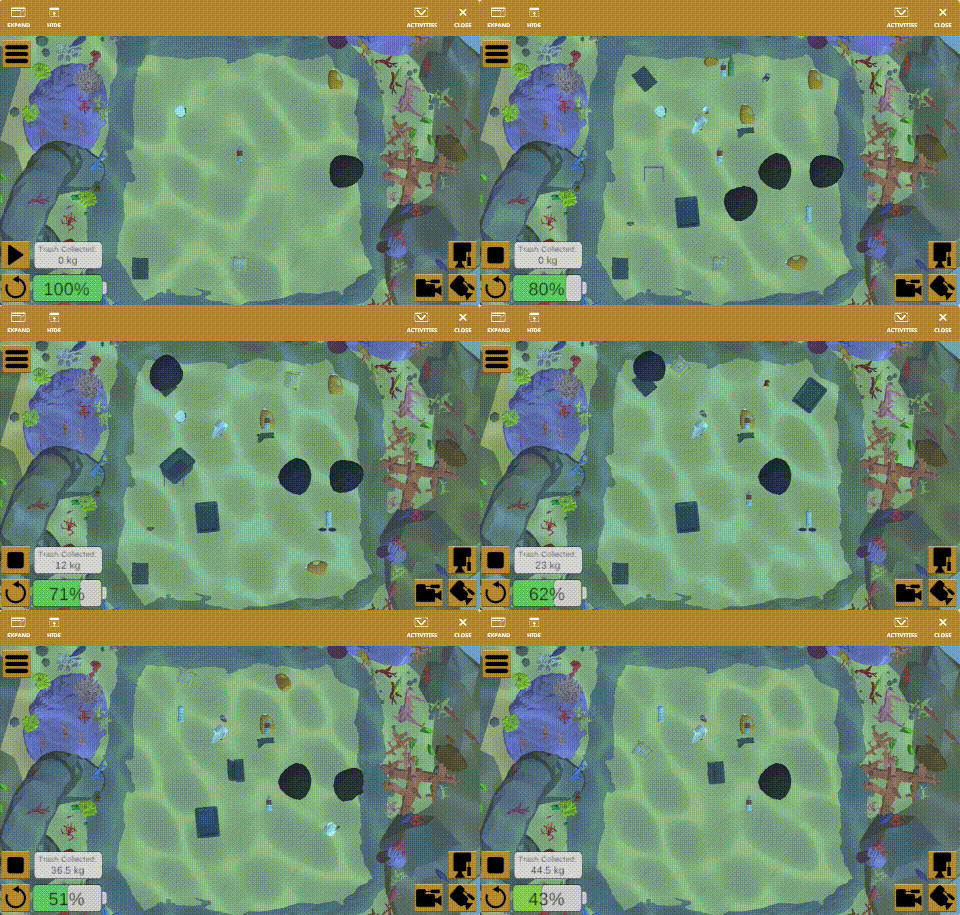
To be continued. In the next post, we will discuss how to apply what we have learned from the Example Project to our own projects.
Please let us know if you have any questions, comments, or feedback. Thank you!

