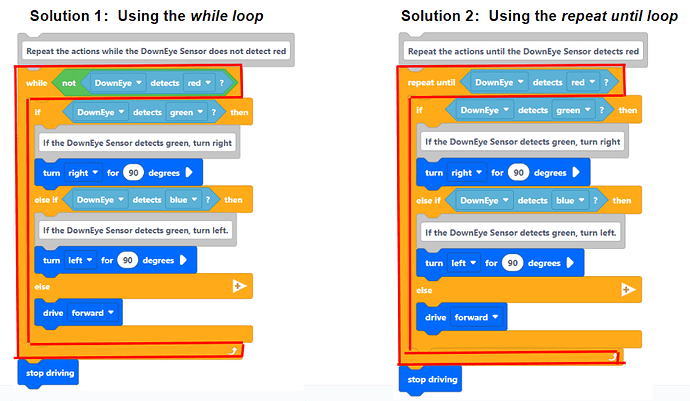
When coding in VEXcode VR, have you ever encountered this situation: the code logic seems perfect, but the VR Robot does not behave as we expected?
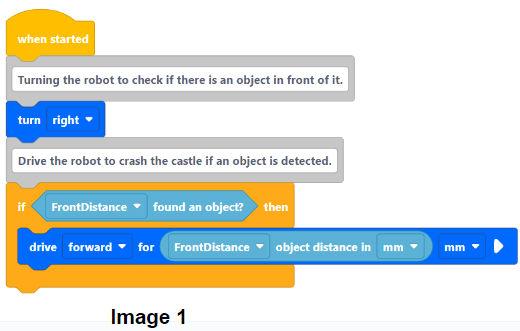
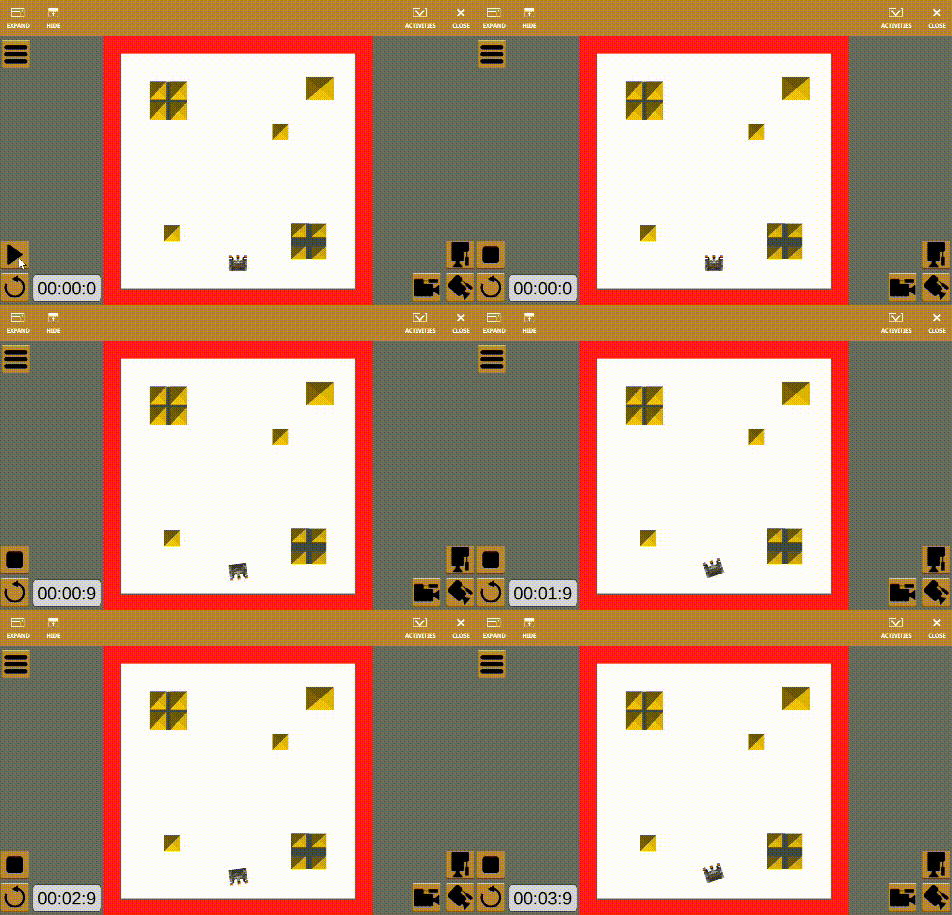
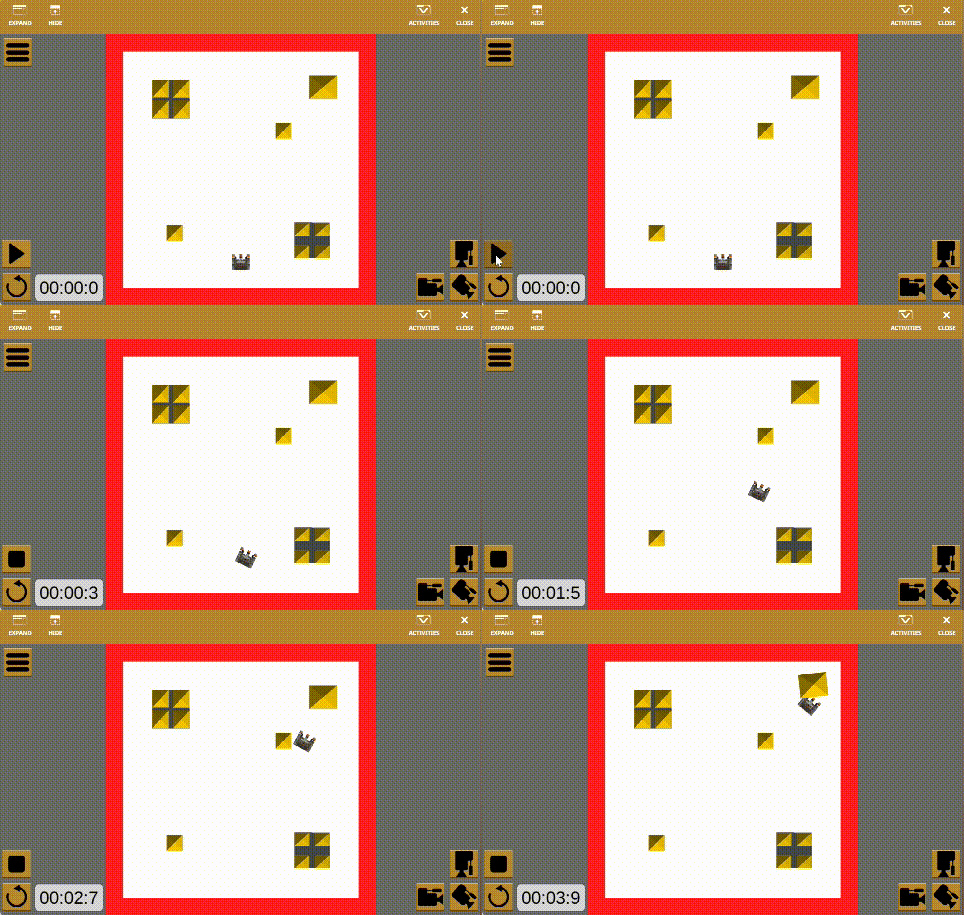
Let’s take a look at the following example (Image 1). On the Castle Crasher Playground, we instruct the robot to turn right to check if there is an object in front of it. If an object is detected, the robot will drive forward to it. However, instead of moving toward an object, the robot keeps turning right.
What’s the issue? It arises because the robot only checks for objects once at the very beginning of the project’s execution. By the time the robot aligns with an object, the project has already finished its execution, so the robot will not take any action.
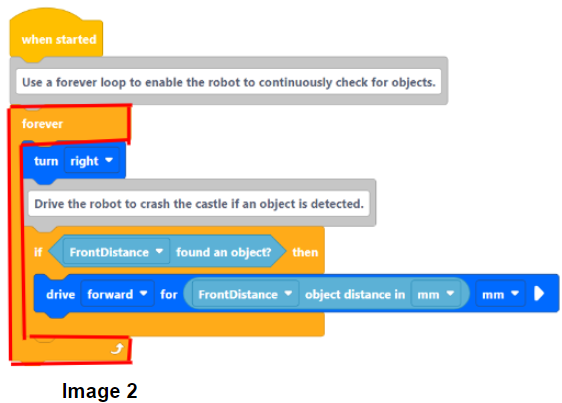
To solve this problem, we can incorporate a forever loop in the project (Image 2), enabling the robot to constantly check for the objects. Once an object is detected, the robot will drive to it.
Loops are an essential component of coding. It allows us to execute a specific block of code over and over again. In other words, loops offer us a quick and easy way to do something repeatedly.
Types of Loops in VEXcode VR
In VEXcode VR, there are various types of loops we can use when we want to repeat a certain action in code multiple times. The following are the example loop blocks:
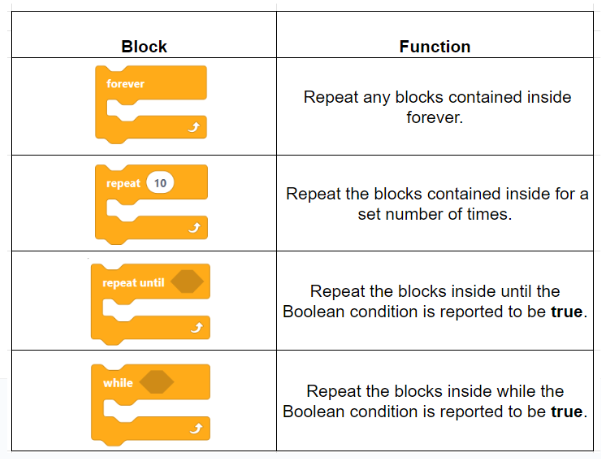
Use Different Types of Loops in the VEXcode VR projects
We have previously discussed the usage of the forever loop, the type of loop that continuously runs until we terminate the program, in our first example. Now let’s explore how to use the repeat loop, the while loop, and the repeat until loop according to the task requirements in our projects.
- Use the repeat loop when we know how many times the loop will execute.
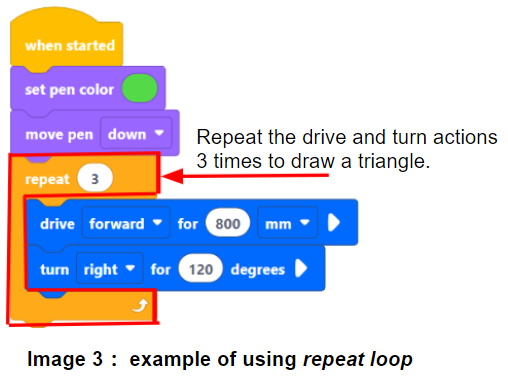
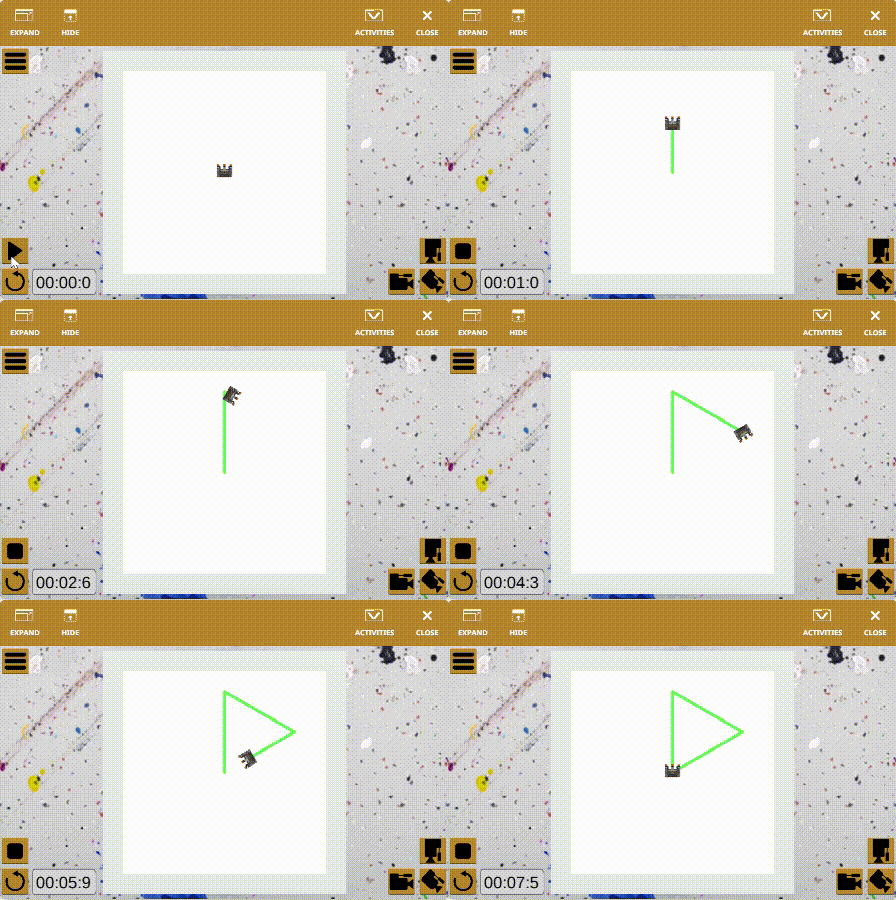
A typical example of using the repeat loop is to draw polygons on the Art Canvas+ playground. For instance, if we want to draw a triangle, we just need to repeat the following steps three times:
1). Drive the robot forward for a certain distance;
2). Turn the robot right 120 degrees.
- Use the while loop or the repeat until loop when we don’t know how many times the loop will execute but want to keep repeating until a specific condition is met. (These two types of loops are also called conditional loops.)
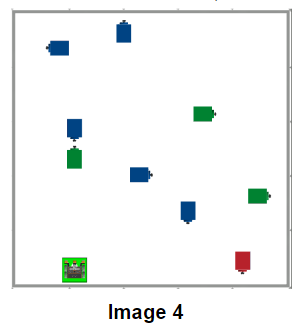
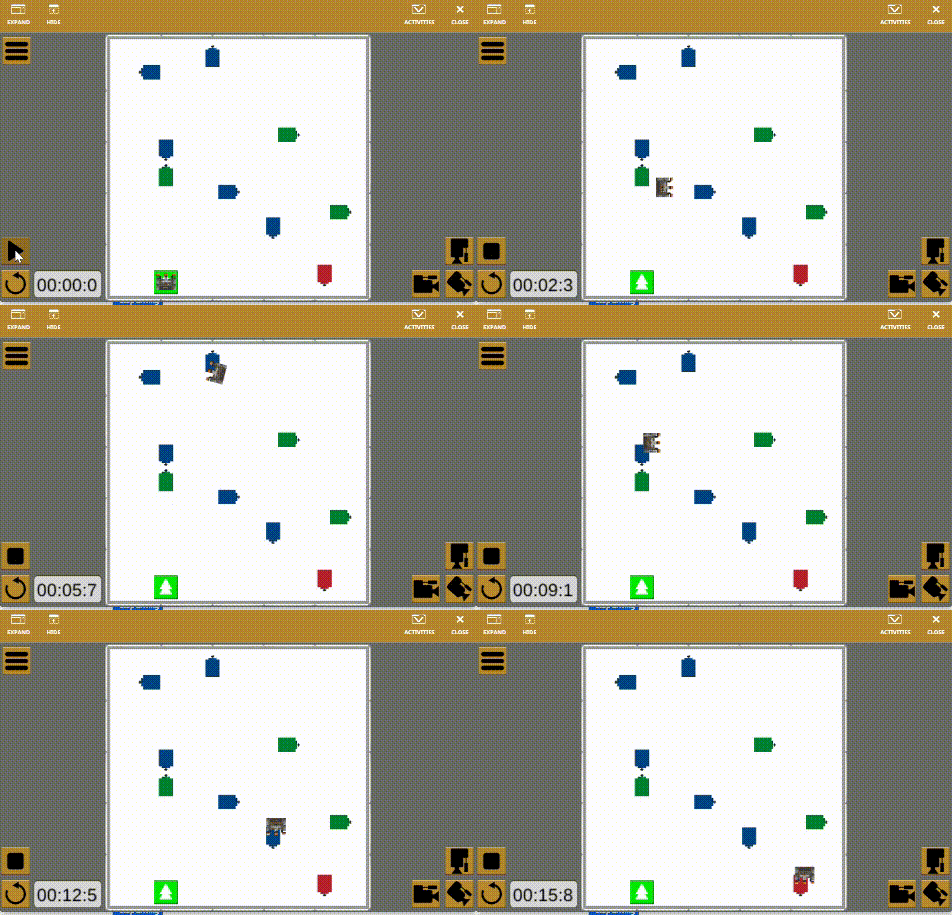
For example, to solve the Disc Maze (Image 4) in the VEXcode VR, our algorithm can be:
Repeating the following steps until the DownEye Sensor detects red:
1). Drive the robot forward;
2). If the DownEye Sensor detects green, turn right 90 degrees;
3). If the DownEye Sensor detects blue, turn left 90 degrees.
We can use either the while loop (Solution 1) or the repeat until loop (Solution 2) to implement this algorithm.
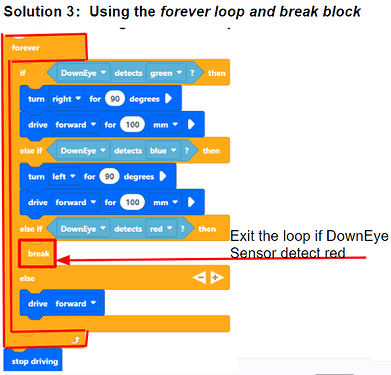
In addition to these two solutions, we can also use the forever loop and break block to solve this Disc Maze challenge (see Solution 3).
Note: the break block allows us exit a repeating loop immediately.

All these three solutions can successfully navigate the robot from the starting point to the red area. Thus, this is a great example that shows us there is no standard coding solution. Using various loops flexibly according to the task requirement can make our code more efficient and adaptable.
To be continued.
Hope this information helped and please let us know if you have any questions, comments, or feedback. Thank you!
