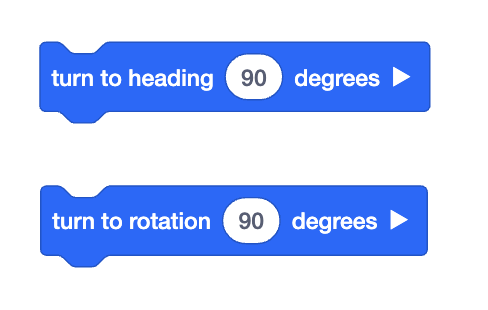
This is great information. These blocks initially seem like a tricky concept to grasp, but they are really useful, especially turn to heading.
So why would you use turn to heading and not just stick with turn left or turn right for X degrees instead?
Well, as Lauren says, the turn to heading block is an actual position relative to zero. It’s a bit like a compass, where your direction is relative to north. If you know where north is, you can then face any direction you like. The same is true of turn to heading.
In VEXcode VR, by default zero degrees (lets call that our north) is directly up the Playground. 90 degrees (east) is to the right, 180 degrees (south) is to the bottom and so on.
That means if ever you want to drive up the playground (north) you can just turn to heading 0 degrees. It doesn’t matter where you were prior to that point.
This has lots of uses. It is great when maze solving for example. And on a physical robot, often a wall, game object or something else might slightly knock your robot off course during a run. That means if you turn left or right x degrees from that messy position, the rest of your run will also be off. By using turn to heading instead, the robot will have a better chance of moving accurately for the rest of the run. Let’s look at an example in VR.
Try this:
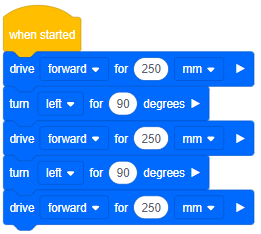
Open the Wall Maze Playground and put in this code:

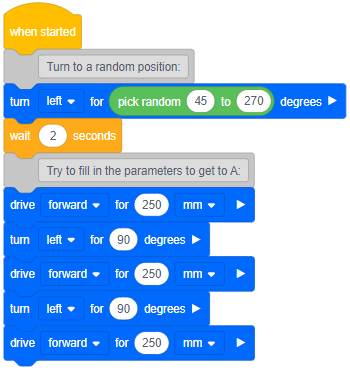
That gets us from the start to location A. All good. Now let’s throw in a random element to simulate bumping off a wall/element/other robot etc. In this case, our robot will now turn to a random direction at the start of the code:

Have a few goes at trying to guess what value you should put in the parameters in order to get to A. Did you get there?
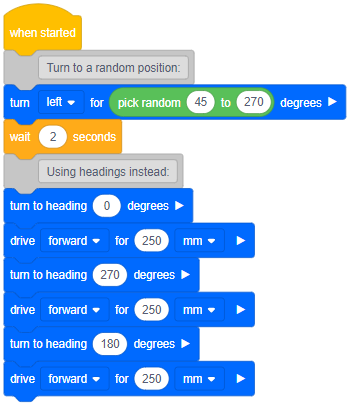
Now try this:

The robot still turns to a random position, but this time, we turn back to a heading of 0 degrees (north) after the random turn, and always turn to the relevant heading from there on. Run it a few times and see what happens.
This time the robot always makes it to the A, regardless of where it ends up after the random turn.
Note for physical robots: By default, the zero will be straight ahead to the robot when the gyro finishes calibrating. You might want to use the set heading to 0 block in your code, perhaps triggered by a bumper press or similar, to set your zero (north) before you begin a run.

![]()


